



TrueNAS Web Install
6 minute read
TrueNAS Connect allows you to install TrueNAS (version 25.10 or later) on your system using the web-based installation feature through your browser. This process works well for most users whose systems have USB as the priority boot choice, even when the system does not have IPMI access or VGA ports available.
The streamlined installation automatically handles authentication and configuration setup without requiring a keyboard, mouse, or display connected to the target system.
Prerequisites
Before beginning the remote installation:
Prepare the Installation Media
- Download the TrueNAS ISO file from the TrueNAS download page. Check the Software Status page for the recommended release to install.
- Flash the TrueNAS ISO to a USB drive. For detailed instructions, see Preparing the Install File
The target system must boot from USB by default. Consumer-grade NAS systems typically have USB as the priority boot choice. If your system does not boot from USB automatically, a TrueNAS Connect remote install is not possible. Instead, install TrueNAS directly on the system, then connect it to TrueNAS Connect from the TrueNAS UI.
Verify Network Requirements
- Both the computer accessing TrueNAS Connect in your browser and the target system must be on the same local network segment.
- The target system must be able to reach that computer over the local network.
- The target system must have Multicast DNS capability for automatic discovery.
The web installation process and initial system configuration require local network access. TrueNAS Connect uses a secure architecture in which all installation commands flow directly from your browser to the target system over your local network. TrueNAS Connect servers only provide authentication—they never handle system management commands.
Setting Up the Target System
- Place the TrueNAS installation USB drive into the target system.
- Boot up or restart the target system - it should automatically boot from the USB drive if USB is configured as the priority boot choice.
- Allow time for system detection. The TrueNAS installer starts and makes the system discoverable by TrueNAS Connect. Allow time for the system to complete initial startup. TrueNAS Connect automatically detects the system when it is ready.
Accessing the Remote Installation Feature
From the TrueNAS Connect dashboard, click Install TrueNAS to launch the Install Assistant.
Connecting the System
Using Install Assistant Features
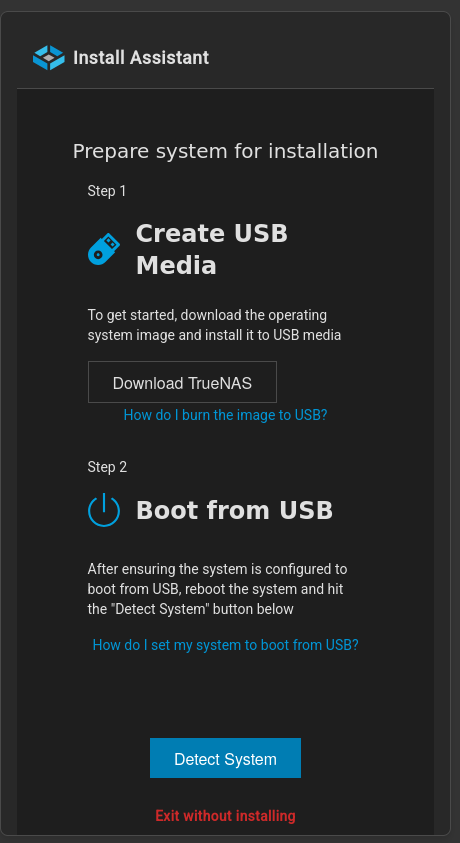
The Install Assistant opens to the Prepare system for installation screen. This screen presents two steps:
- Step 1: Create USB Media - This step covers the same USB preparation described in the Prerequisites. If you have not already created the media, click Download TrueNAS to get the TrueNAS image. The How do I burn the image to USB? link provides instructions for creating bootable USB media.
- Step 2: Boot from USB - Configure the target system to boot from the USB media. The How do I set my system to boot from USB? link provides guidance on boot configuration.
The Detect System button at the bottom of the screen starts the search for your target system.
Initiating the Remote Installation Process
After you have created the bootable USB drive and powered on the target system, continue with the detection process:
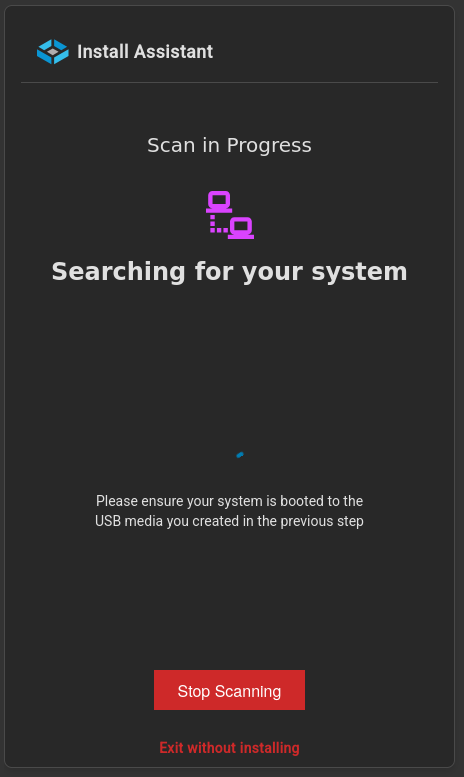
After inserting the USB drive into the target system and powering it on, click Detect System in TrueNAS Connect. The Install Assistant displays Scan in Progress and searches for your system on the network.
When TrueNAS Connect finds the system, the Install Assistant displays System Found and a Continue button. Click Continue to proceed with the installation.
NoteIf the target system does not appear, the local installer interface did not start. Click Stop Scanning to return to the previous Install Assistant screen, or exit the installation. Confirm the target system booted from the USB media, then click Detect System again.
TrueNAS Connect establishes a secure connection with the installer through automatic certificate generation and host name assignment.
After the connection is established, the Install Assistant guides you through system registration and the installation wizard to configure and install TrueNAS. The installer saves an authentication token and certificate to the TrueNAS system so it can reconnect to TrueNAS Connect automatically after installation.
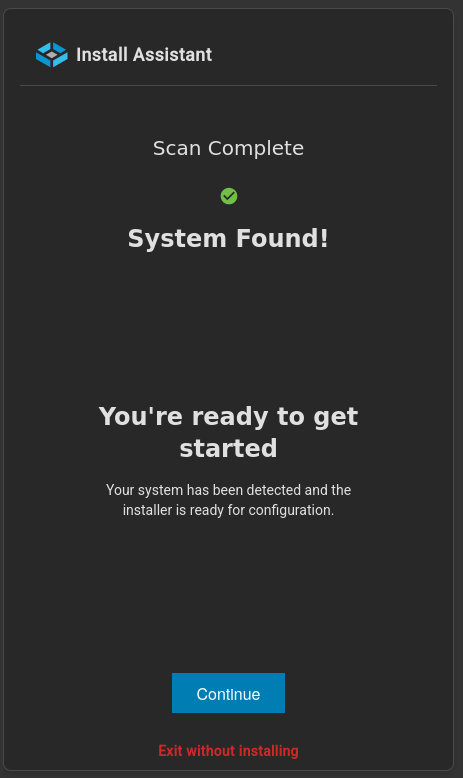
Using the Automatic Connection Setup
During the remote installation, TrueNAS Connect automatically:
- Detects the target system on your local network.
- Generates secure installation credentials.
- Establishes encrypted communication between TrueNAS Connect and the installer.
- Initiates the registration process.
Completing System Registration
The registration process connects your target system to your TrueNAS Connect account. The installer automatically opens a new browser tab with a locally hosted TrueNAS interface at truenas-installer.local where you complete the registration form.
Completing the Registration Form
Complete the Add System registration form with your system details. The installer token passes automatically through the registration process, so you do not need to enter tokens manually.
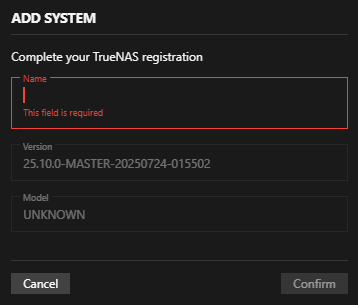
System Information
Type a Name for the system to complete registration. The Version and Model fields populate automatically from the detected system.
Submit Registration
Click Confirm to proceed with the registration. The system processes your registration and generates SSL certificates automatically.
Using the Installation Wizard
After successful registration and certificate generation, TrueNAS Connect displays your system dashboard and launches the installation wizard.
Completing Installation
The installation wizard guides you through the following steps:
System Settings:
- Setup truenas_admin credentials: Configure the administrative user account credentials.
Storage Configuration:
- Select the installation target from the available disks by size.
- Choose an appropriate disk and confirm the data erasure warning.
NoteThe remote install process assumes new hardware, so no existing data is presumed to exist on the system disks. Previous disk information, indicating which disk previously held the system configuration, does not appear.
- Mirror Installation: If the system detects multiple disks of the same size, you see additional options:
- Mirror my TrueNAS installation for extra protection checkbox. or the warning:
- We detected a TrueNAS installation on another drive. This can cause problems during the installation process.
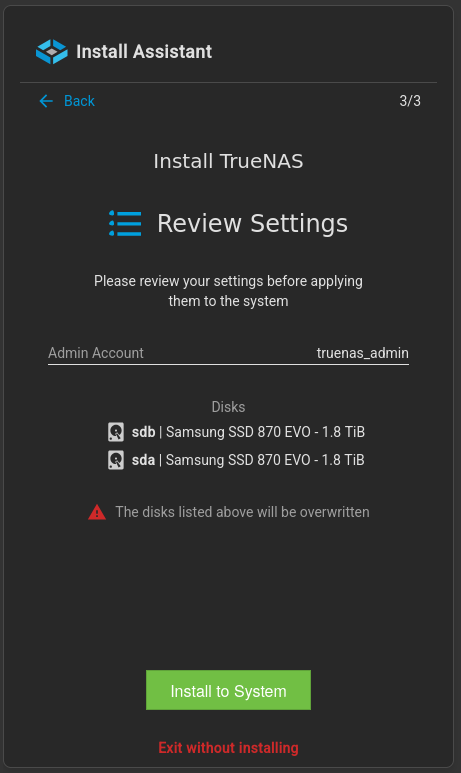
Review and Install:
- Click the Review button to review your configuration settings.
- Click Install to System to begin the installation.
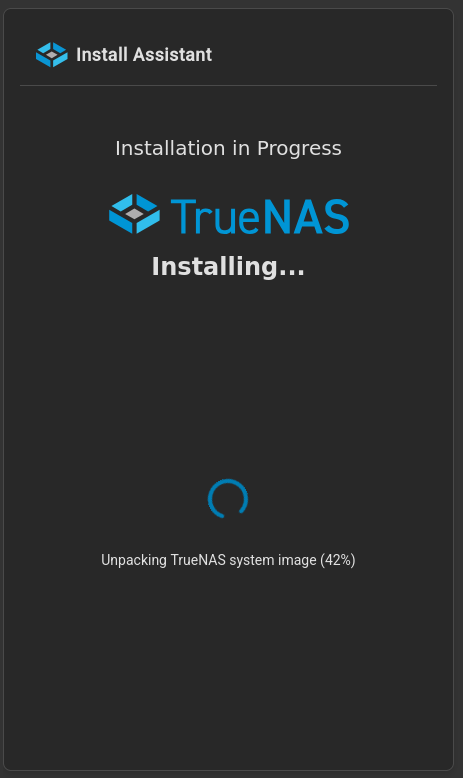
The Install Assistant displays Installing… and shows progress as it unpacks the TrueNAS system image.
Post-Installation Steps:
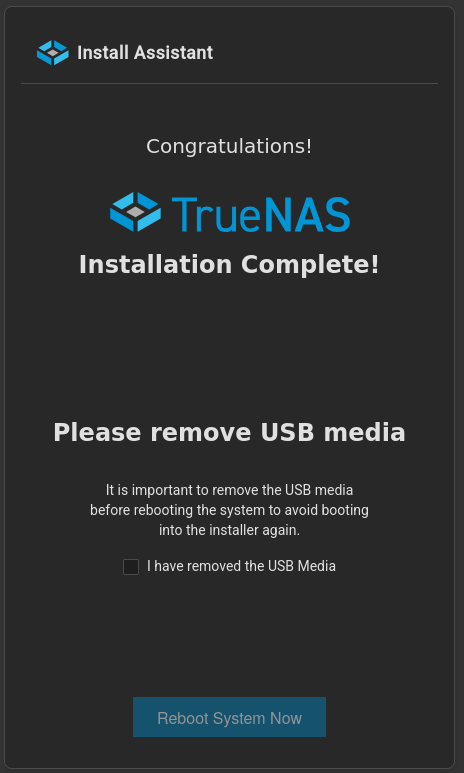
When the installation finishes, the Install Assistant displays Installation Complete! and prompts you to remove the USB media.
- Select the I have removed the USB Media checkbox.
- Click Reboot System Now to restart the system.
- The installer disappears temporarily from the TrueNAS Connect dashboard.
- The system returns to the dashboard showing Connecting status until TrueNAS is fully operational.
- The installed TrueNAS system automatically reconnects to TrueNAS Connect using the saved credentials.
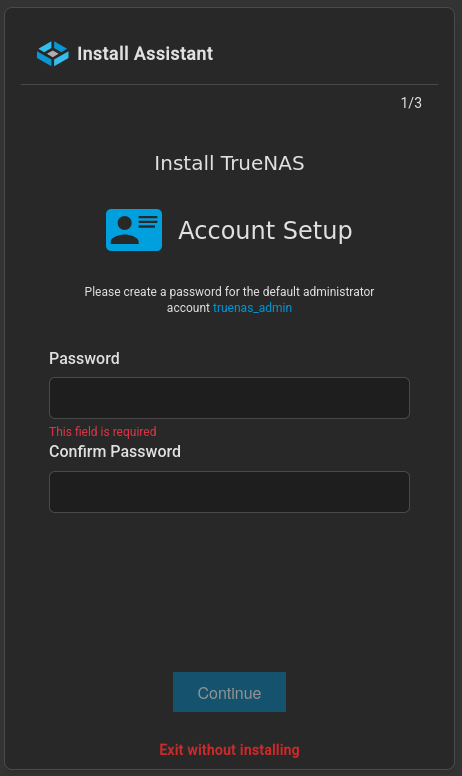
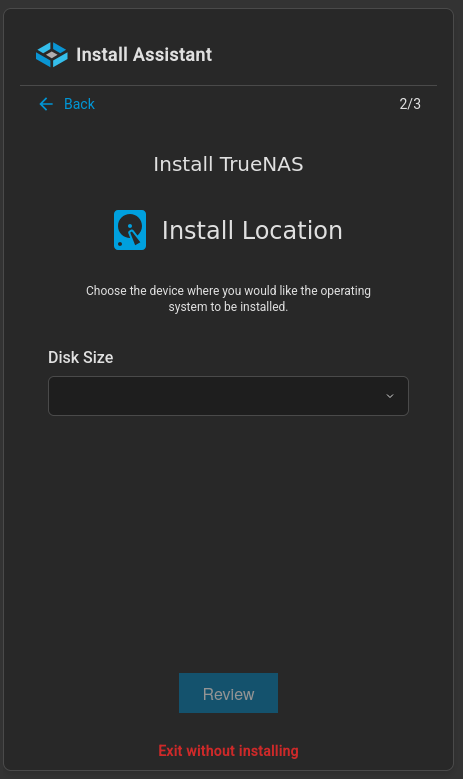
After the system completes its first boot, it appears in your TrueNAS Connect dashboard and becomes available for secure management.
Accessing the System
After the system reconnects to TrueNAS Connect:
- Refresh the TrueNAS Connect dashboard.
- Confirm you can access the system by clicking Open TrueNAS UI from TrueNAS Connect.
Your system is now ready for configuration and management through both TrueNAS Connect and the direct TrueNAS interface.