



Getting Started with TrueNAS Connect
13 minute read
Accessing TrueNAS Connect for the first time is as easy as clicking on the Status of TrueNAS Connect icon located in the top toolbar of your TrueNAS system UI. All that is required is full administration access to the TrueNAS server and an OAuth account.
Your system must be using 25.10.1 or later to use TrueNAS Connect.
Setting Up TrueNAS Connect
Begin by logging into the TrueNAS server as an administrator. After logging into your TrueNAS system as a full administrator, click on the TrueNAS Connect icon to open the TrueNAS Connect dialog.
Before you sign up for TrueNAS Connect, the dialog shows it is waiting to connect.
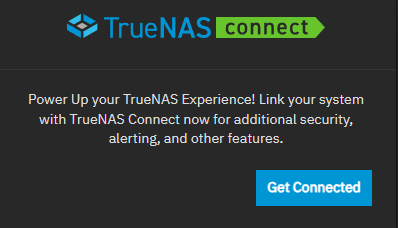
Click Get Connected to open the TrueNAS Connect login screen.
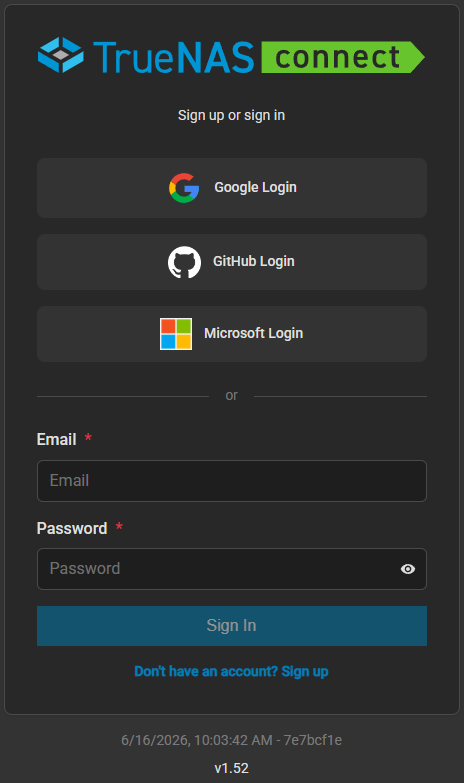
Choose the OAuth provider you want to use to log into TrueNAS Connect. The OAuth account used is registered as the authentication account for TrueNAS Connect.
You can use an existing OAuth account or create a new account. The option to use an email account is planned for a future update.
Follow the sign-in process for your chosen OAuth provider until you reach the Account Confirmation window. Click the link on the Account Confirmation window to view the Terms of Service.
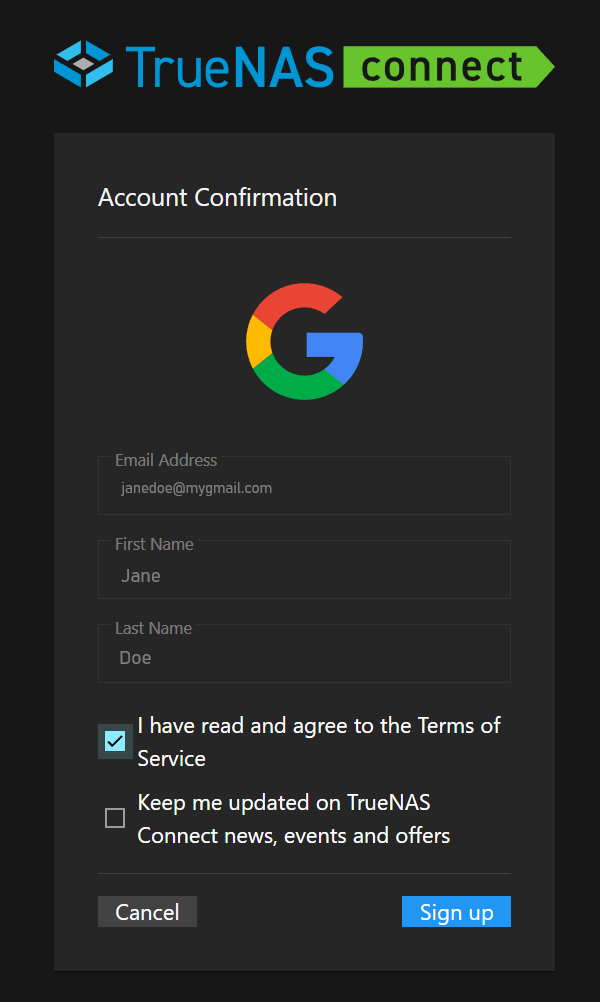
Read the Terms of Service, then select the option to indicate that you read and agree to the Terms of Service.
Select the option to receive updates on TrueNAS Connect news, events, and offers to receive notifications from TrueNAS Connect.
Click Sign Up to open the TrueNAS Connect Dashboard.
TrueNAS Connect prompts you to complete the system registration and add the system to TrueNAS Connect. After adding the system, a system information card shows on the main Dashboard screen.
Repeat this process for each TrueNAS system you want to add to TrueNAS Connect.
After adding your system, you can customize the interface.
On TrueNAS, after connecting to TrueNAS Connect and registering the system, the Status of TrueNAS Connect icon shows an active status indicator. The TrueNAS Connect dialog shows the status of the active connection.
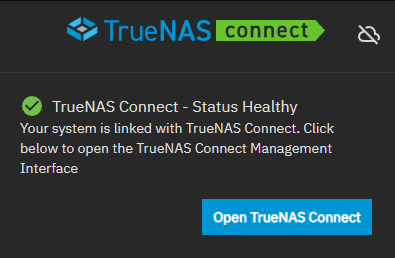
Click Open TrueNAS Connect to open the TrueNAS Connect management interface. Click cloud_off Disable Service to disconnect the system from TrueNAS Connect.
Logging In Using a Google Account
To sign into TrueNAS Connect with a Google account, click Login with Google. The Sign In with Google window opens. Choose the Google account you want to use to register your system in TrueNAS Connect.
If using an existing Google account, enter the email or phone number and click Continue. Select the existing Google account to use for the TrueNAS Connect authentication and credentials to log into TrueNAS Connect. Confirm the account on the Account Confirmation window as described above in Setting Up TrueNAS Connect.
If creating a new account, click Create Account and follow the Google account creation process until you reach the Account Confirmation window for TrueNAS Connect.
After completing the account confirmation, the TrueNAS Connect main Dashboard shows and prompts you to register your system.
Logging In Using a GitHub Account
To sign into TrueNAS Connect with a GitHub account, click Login with GitHub. The Select user to authorize window opens. Sign in with your existing GitHub account or click Use a different account to choose an account or create a new Google account.
If you are using an existing GitHub account, enter the user account name or the email associated with the account, then click Sign In. Follow the GitHub authentication process until the Account Confirmation window shows. Confirm the account on the Account Confirmation window as described above in Setting Up TrueNAS Connect.
If creating a new account, follow the GitHub account creation process until you see the Account Confirmation window for TrueNAS Connect. After completing the account confirmation, the TrueNAS Connect main dashboard opens, and the system prompts you to register your system.
Registering a System
After logging into TrueNAS Connect, you are prompted to complete the system registration using the Add System dialog.
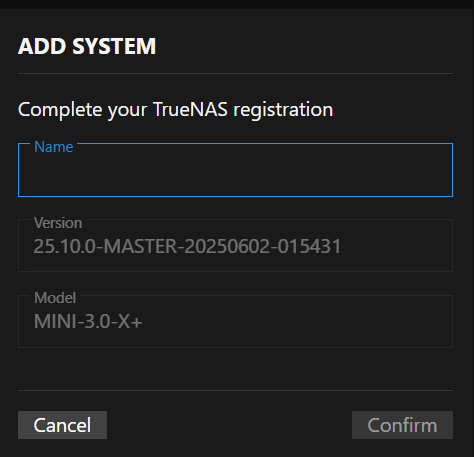
Enter a name for your system, such as the host name or a name that helps identify the purpose of the system. For example, backup1, TNserver1, etc. Click Confirm to add the system.
To register another system, begin in the TrueNAS system UI. Log in to the TrueNAS system UI as an administrator with full admin privileges. Follow the instructions provided in Setting Up TrueNAS Connect to log into TrueNAS Connect using the same OAuth account used to set up TrueNAS Connect.
Repeat this for each system you want to add to TrueNAS Connect.
Why won’t my NAS connect after registering?
If your system stays offline after you register it, DNS rebinding protection on your router is the most common cause. This security feature blocks the truenas.direct domain that TrueNAS Connect uses to reach your system at its local IP address.
Resolve DNS rebinding protection
DNS rebinding protection blocks public host names that resolve to private IP addresses on a local network. TrueNAS Connect connectivity involves two domains:
truenas.directresolves your system to its local IP address. This is the domain that DNS rebinding protection blocks.truenasconnect.netis the TrueNAS Connect web portal.
To fix the connection, add truenas.direct to the DNS rebinding protection exceptions on your router. Some users have also needed to allow truenasconnect.net in their router or firewall settings. Add it as well if the connection still fails after you allow truenas.direct.
Adding truenas.direct to the DNS rebinding exceptions resolves the connection problem for most users.
The exact steps depend on your router or DNS resolver. Many home routers provide a single DNS rebind protection setting in their web interface. Open that setting and add truenas.direct as an allowed domain. Routers and DNS resolvers that use a configuration file need a specific entry instead. The settings below show how to add truenas.direct for two of these configurations. These are examples, not a complete list. Check the documentation for your hardware for the exact steps.
| Router or DNS resolver | Setting to add |
|---|---|
| dnsmasq | rebind-domain-ok=/truenas.direct/ |
| pfSense or OPNsense (Unbound DNS) | Add a custom option with an explicit server: block, then domain-insecure: "truenas.direct" on the next line. pfSense does not add the server: block automatically for custom options. |
If you cannot edit the DNS rebinding exceptions, try these alternatives:
- Change your DNS servers. Configure your router to use a public DNS provider such as Cloudflare (
1.1.1.1) or Google (8.8.8.8). This helps in some setups. It does not work when the router enforces DNS rebinding protection on all responses. - Test with the IP address. Open the TrueNAS system UI directly using its local IP address. A successful connection confirms that the system is reachable and that DNS rebinding protection is blocking the
truenas.directhost name. - Add a separate local DNS resolver. Set up a resolver such as Pi-hole, dnsmasq, or Technitium DNS Server on your network. Configure it to resolve
truenas.directto the local IP address of your system and forward every other query to your router. Because some routers do not support DHCP options for DNS, you might need to set the new resolver as the DNS server manually on each device. - Put the router into bridge mode or modem-only mode. Contact your internet service provider to enable this mode, then connect a separate router that supports DNS rebinding exceptions behind it.
Some routers do not support DNS rebinding exceptions, a custom DNS resolver, or bridge mode. If none of these options resolve the connection issue, contact your network administrator, router manufacturer, or internet service provider for help.
Adding a Keyring
Keyrings are useful for quickly authenticating your TrueNAS servers with an API key.
To add a keyring, click Create Keyring. The Create Keyring Passphrase window opens.
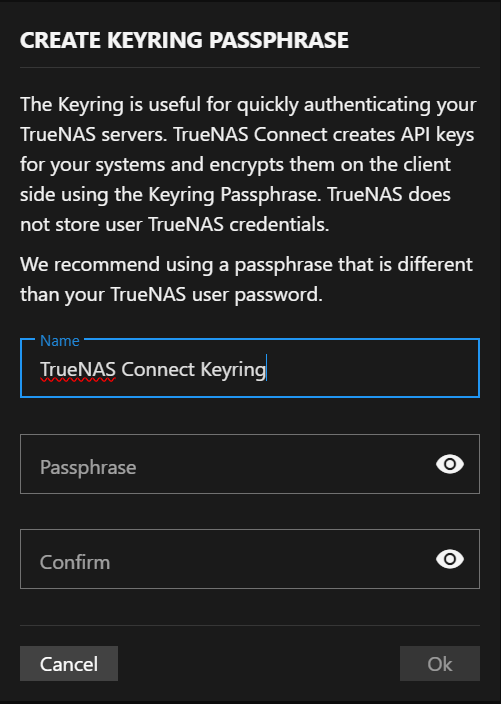
Enter a strong passphrase in Passphrase and re-enter it in Confirm. Click OK to add the keyring.
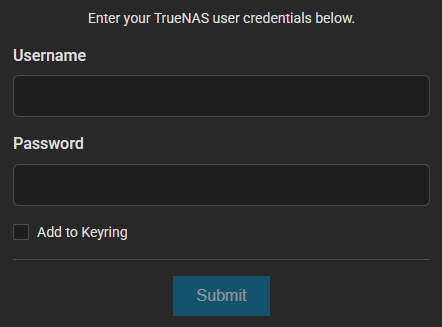
You can apply one keyring to all your systems. Select the Add to Keyring option on the system card where you enter the credentials to log into each system.
Unlocking a System
After logging out of TrueNAS Connect, the Unlock Keyring dialog shows when you sign in again. Enter your passphrase for the keyring to authenticate system access. If you include other systems in the keyring, each included system is authenticated with the keyring. Authenticated systems show the system cards populated with information received from the TrueNAS on the Dashboard.
Customizing TrueNAS Connect
Customizing the Dashboard
You can customize the main Dashboard to show or hide the Tags, Systems, and Onboarding items. Click the Configure icon at the top right of the main Dashboard to open the Dashboard Configuration dropdown.
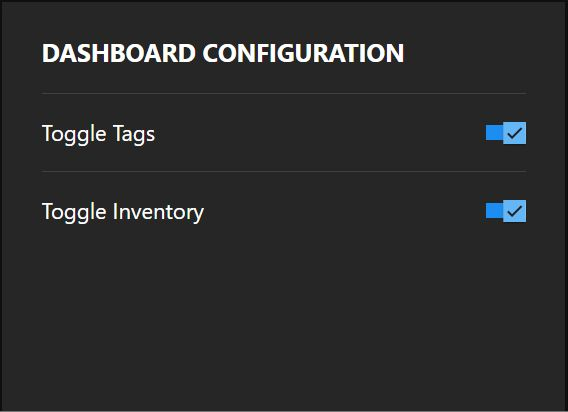
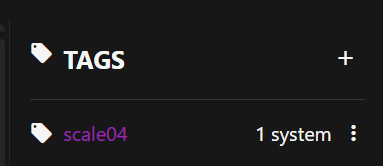
Select Tags to show or hide the Tags widget. Tags lists system tags created in TrueNAS Connect, and an option to add tags for other systems. If you hide the Tags widget, you can add tags from the Tags option on the main menu dropdown.
Select Systems to show or hide the Systems widget that lists systems by name on the right side of the Dashboard. Each system listed in the Systems widget shows a Visibility icon that toggles showing or hiding the system information card on the main Dashboard.
Select Onboarding to show or hide the onboarding cards. The onboarding cards show quickstart guidance, such as using tags to organize your TrueNAS servers.
Using Tags to Organize Your Systems
Tags are customizable labels that help you organize and manage multiple TrueNAS systems in TrueNAS Connect. Each tag consists of a name and a color that you can apply to your systems to quickly identify and filter them.
Creating and Using Tags
To create a tag, click the icon in the Tags widget on the dashboard. Enter a descriptive name and select a color to distinguish the tag visually.
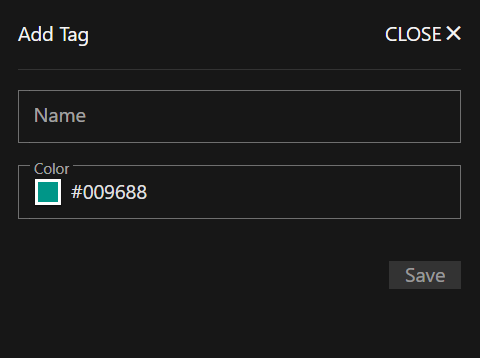
After creating tags, apply them to systems from the Inventory widget using the icon, or directly from system cards. Tags then appear on system cards and become available as filter options in the dashboard Filter field.
Customizing Your Account and Avatar
You can customize your TrueNAS Connect account by viewing your account information and setting a custom avatar image.
To access your account settings, click the My Account option in the main navigation menu.
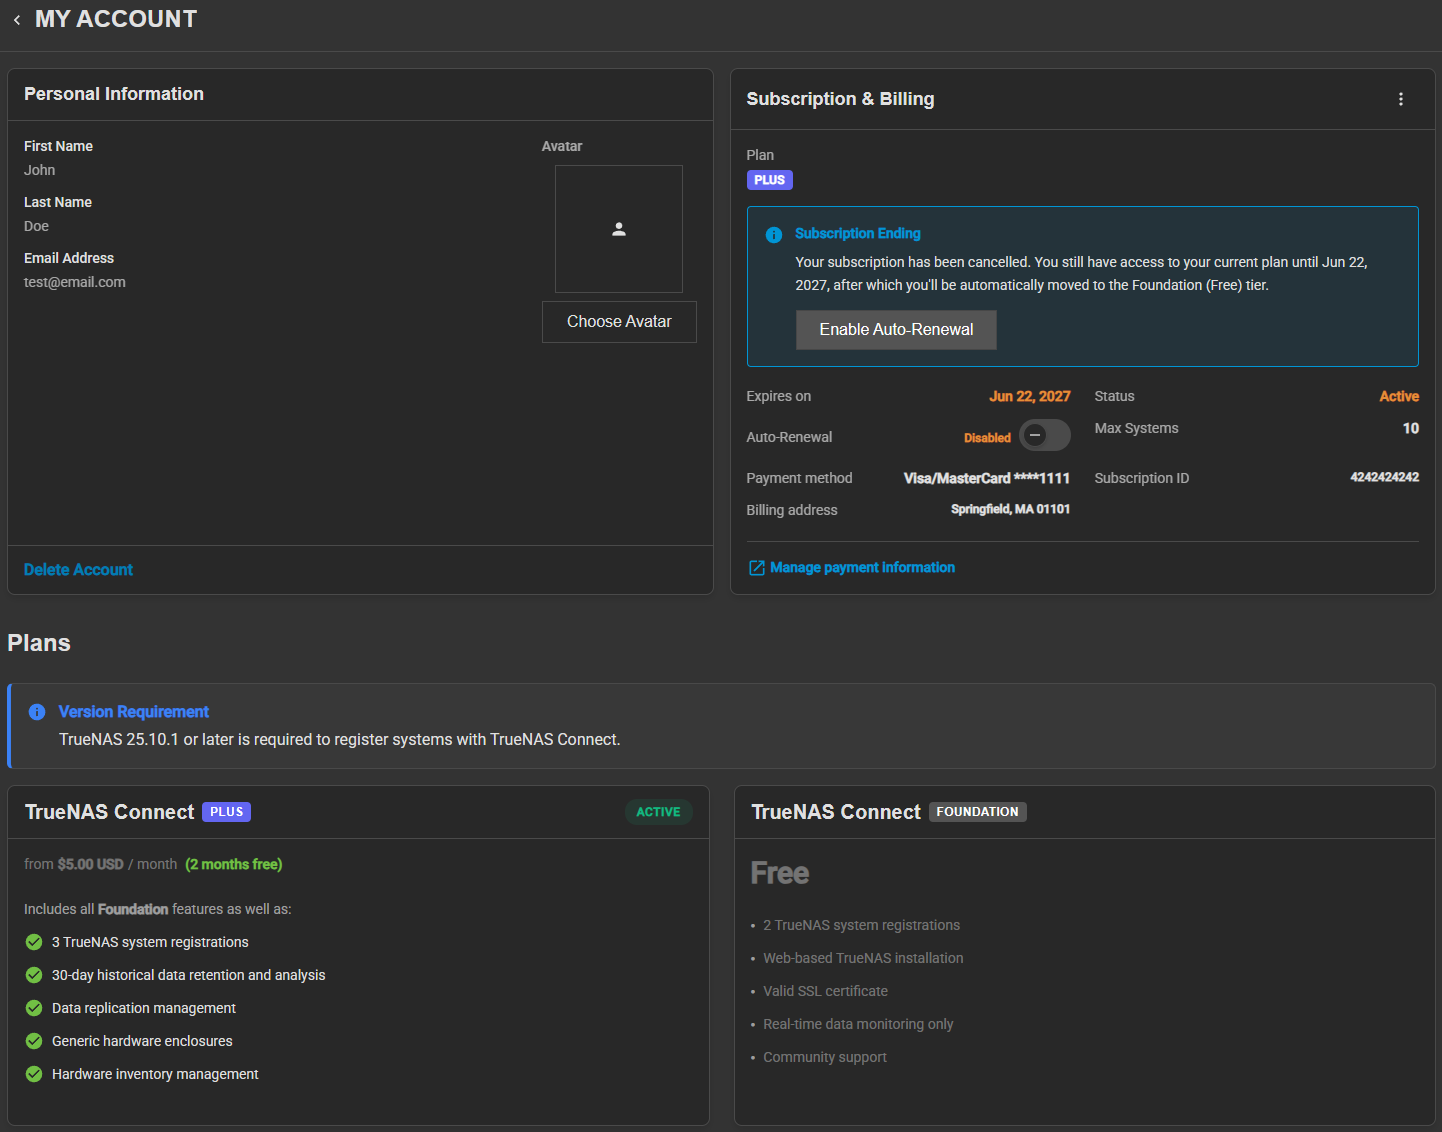
Viewing Your Account Information
The Personal Information widget shows your account information, including your email address, first name, and last name.
The account fields (Email Address, First Name, and Last Name) are read-only and show the information from your account used to authenticate with TrueNAS Connect.
Setting Your Avatar
You can personalize your TrueNAS Connect account by uploading a custom avatar image.
To upload an avatar:
- In the Avatar area, click Choose Avatar. A file selection dialog opens.
- Select an image file from your computer in JPG, PNG, or WebP format. TrueNAS Connect applies the new avatar.
Your avatar image appears throughout TrueNAS Connect, including in the main navigation and system cards.
To remove your current avatar, click the button to return to the default account icon.
Understanding TrueNAS Connect Connection States
TrueNAS Connect uses a secure architecture designed to protect your data and maintain direct control over your systems. All commands that could modify your NAS never touch TrueNAS Connect servers. TNC serves as an authentication service, but all management commands flow directly from your browser to your NAS over your local network.
This design ensures that TrueNAS Connect servers only handle authentication—all management commands go directly from your browser to your NAS. By requiring local network access (or VPN) for these operations, you maintain direct control over your system while still benefiting from centralized monitoring.
This security-focused design results in three possible connection states depending on your network configuration and system status.
State 1: Full Local Access (Recommended)
When you access TrueNAS Connect while connected to the same local network as your NAS (or through a VPN), you experience the complete TrueNAS Connect feature set:
- Real-time system statistics
- Application management
- Replication job management
- System configuration changes
- Full interaction with all features
This is the ideal TrueNAS Connect experience and provides full access to all management capabilities.
Initial system configuration and registration require local network access. You must be on the same network as your TrueNAS system when setting up TrueNAS Connect for the first time.
State 2: Remote Access (Limited Functionality)
When you access TrueNAS Connect from outside your local network without a VPN connection, your NAS remains connected to TrueNAS Connect, but limits functionality:
- Available: Periodic heartbeat updates from your NAS provide basic system statistics
- Unavailable: Commands to your NAS (application management, replication job updates, system configuration changes, etc.)
This state occurs when you access the TrueNAS Connect website away from home or your office network without a configured VPN. Your system remains registered and monitored, but you cannot send commands to the NAS from your browser.
State 3: System Offline
When your NAS cannot communicate with TrueNAS Connect or your browser, the system appears offline in the dashboard. This state typically occurs when:
- You power off the NAS or disconnect it from the network
- The TrueNAS Connect service stops running on the NAS
- Network connectivity issues prevent communication
In this state, TrueNAS Connect cannot display current system information or accept management commands until you restore connectivity.
Network Requirements for Full Functionality
To ensure the complete TrueNAS Connect experience:
- During initial setup: You must be on the same local network as your TrueNAS system to complete registration and configuration.
- For ongoing management: Access TrueNAS Connect from your local network or establish a VPN connection to your network when accessing remotely.
- For monitoring only: Remote access without local network connectivity still provides basic system health monitoring through heartbeat updates.
Understanding Data Collection and Privacy
When you connect your TrueNAS system to TrueNAS Connect, the service collects operational metrics and system health information to provide monitoring, reporting, and management capabilities. This data collection enables features like health dashboards, performance graphs, and proactive alerts.
Collecting System Information
TrueNAS Connect receives the following types of data from your connected systems:
- Storage Metrics - Pool capacity (used and available space), disk read/write operations, and ZFS cache performance statistics
- System Performance - CPU usage and temperature per core, memory utilization, and ARC (cache) statistics
- Network Activity - Network adapter names and data transfer rates (sent/received bytes)
- Application Status - Count of installed and running applications and virtual machines
- System Alerts - Alert messages and severity levels (critical, warning, or informational) generated by your TrueNAS system
This information allows TrueNAS Connect to display real-time system health, generate performance reports, and notify you of issues that require attention.
Protecting Your Private Data
TrueNAS Connect does not have access to:
- Your files, datasets, or any stored data
- User passwords, encryption keys, or API credentials
- The contents of SMB shares, NFS exports, or iSCSI targets
- Network traffic contents or communications
- Personal or business information stored on your TrueNAS systems
- The ability to save installed applications and application names
All collected data consists solely of operational metrics and system status information necessary for monitoring and management.
Securing Data in Transit
Secure WebSocket connections encrypt all data in transit between your TrueNAS system and TrueNAS Connect. For more information about data processing and privacy practices, see the TrueNAS Privacy Policy.