This is the multi-page printable view of this section. Click here to print.
How-To
- 1: Add Notification Tasks
- 2: Customize Your Account
- 3: Export Inventory Data
- 4: Report Bugs and Provide Feedback
- 5: Use Enclosure Maps
1 - Add Notification Tasks
Adding Notification Tasks
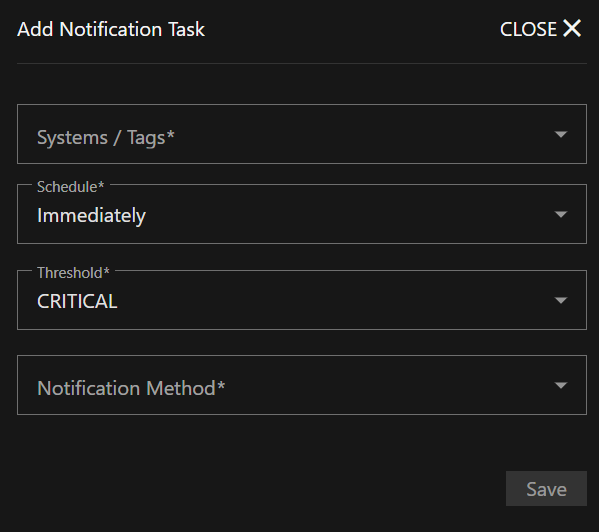
Click Add to open the Add Notification Task screen.
Notification Type
Select the type of notification to create:
- Alert - Sends notifications when alert conditions are triggered based on the threshold settings
- Report - Sends automated reports containing system performance data, storage insights, alert summaries, and predictive analysis
Schedule
Select the frequency to receive notifications for the current task.
For Alert notifications: Select Immediately to have notifications sent as soon as the alert level is triggered or select Hourly, Daily, Weekly, or Monthly to schedule periodic notifications.
For Report notifications: Select Hourly, Daily, or Weekly to schedule automated report delivery.
Threshold
Select the level of alert severity to associate with this notification task. Select CRITICAL, ERROR, WARNING, or INFO to receive notifications for all alerts at the selected level and above.
For example, a notification task set to Immediately and WARNING immediately sends notifications for all at or above the WARNING level, including ERROR and CRITICAL.
Notification Method
Select the contact type for this notification task. Options include Email, Sms text message, Slack, and Pagerduty.
Configure contact account or address details for the selected method in Notification Method Configuration.
Report Content
Automated reports include high-level data points useful for all user personas:
- Storage availability and usage - Pool-level storage metrics and usage trends since last report
- Predictive analysis - Forecasts when storage usage will exceed recommended thresholds
- Available updates - Notifications about TrueNAS system updates and application updates
- Alert history - Summary of critical, error, and warning alerts with resolution status
- Call-to-action link - Direct access to TrueNAS Connect interface for detailed analysis
Enterprise Customization
As users increase TrueNAS Connect tier status, reports become more customizable with additional Enterprise-tier metrics:
- CPU consumption (average and peak usage)
- Memory consumption (average and peak usage)
- Network throughput and roundtrip time statistics
- Storage latency data
- Replication status and duration metrics
- Dataset quota insights and snapshot counts
- TrueNAS access auditing (login activity)
- Critical VM uptime statistics
2 - Customize Your Account
Customizing Your Profile and Avatar
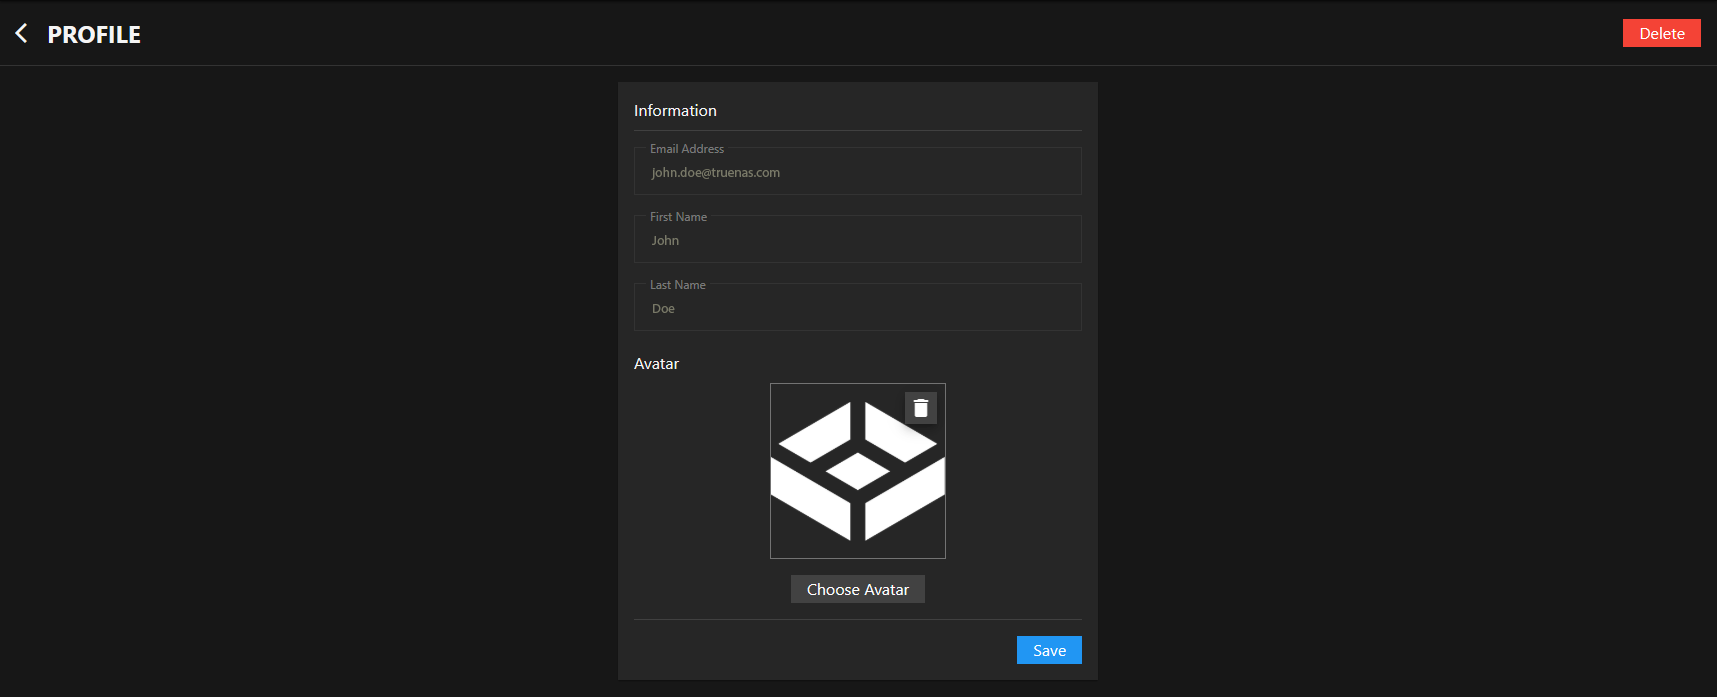
You can customize your TrueNAS Connect account profile by viewing your account information and setting a custom avatar image.
To access your profile settings, click the Profile option in the main navigation menu.
Viewing Profile Information
Your profile displays your account information including your email address, first name, and last name.
Profile information fields (Email Address, First Name, and Last Name) are read-only and display the information from your account used to authenticate with TrueNAS Connect.
Setting Your Avatar
You can personalize your TrueNAS Connect account by uploading a custom avatar image.
To upload an avatar:
- In the Avatar section, click Choose Avatar
- Select an image file from your computer (JPG, PNG, or WebP format)
- Click Save to apply your new avatar
Your avatar image appears throughout TrueNAS Connect, including in the main navigation and system cards.
If you want to remove your current avatar, click the button to return to the default profile icon.
3 - Export Inventory Data
You can export inventory information for reporting, analysis, or record-keeping.
Selecting Export Options
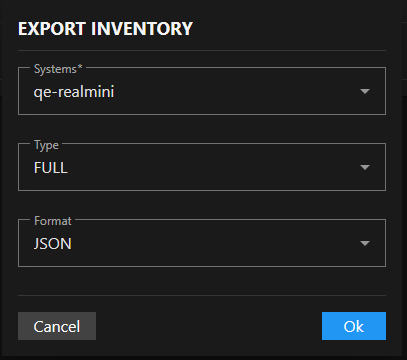
Click the Export button in the top-right corner of the inventory screen to open the Export Inventory dialog with three configuration options.
Systems Selection
Click the Systems dropdown to select which TrueNAS systems to include. Systems appear by hostname (for example, “my-system”).
Choose individual systems or select multiple systems for batch export.
Type Selection
Click the Type dropdown to select the scope of inventory data to export.
- Choose Full for complete comprehensive inventory including system info, hardware specifications, disk information with ZFS pool assignments, GPU details, and technical attributes.
- Select Systems for high-level system information only including system ID, hostname, serial number, TrueNAS version, CPU model, core count, and total memory.
- Pick Disks for storage-focused export containing disk names, models, serial numbers, capacity, type (HDD/SSD), rotation rates, and system association.
Format Selection
Click the Format dropdown to choose the file format for the exported inventory data.
- Select JSON for structured data format suitable for programmatic processing and API integration.
- Choose CSV for comma-separated values format compatible with spreadsheet applications and data analysis tools.
Completing the Export
Review your selections to ensure you’re exporting the correct data scope and format.
Click Ok to execute the inventory export and download the resulting file. The export file downloads to your default download location with the inventory data in your selected format.
4 - Report Bugs and Provide Feedback
Reporting Bugs and Providing Feedback
TrueNAS Connect is actively evolving, and your input helps shape its development. Whether you have found a bug, have a feature request, or want to share general feedback, we want to hear from you.
Accessing the Service Desk
To submit bug reports or feedback:
- Click the Feedback and Support icon button in the top toolbar.
- Click the Support Portal link in the pop-up window.
This opens the TrueNAS Connect Service Desk where you can submit your report or feedback.
Using the Service Desk
The service desk provides two options for submissions:
Report a Bug
Select Report a Bug to report issues, unexpected behavior, or errors you encounter in TrueNAS Connect.
When reporting a bug, you can provide:
- Summary - Brief description of the issue
- Description - Detailed explanation of the problem and steps to reproduce it
- Labels - Tags to categorize your bug report
- Frequency - How often the issue occurs
- Priority - Severity level of the issue
Request an Improvement
Select Request an Improvement to suggest new features, enhancements to existing functionality, or usability improvements.
When requesting an improvement, you can provide:
- Summary - Brief description of your suggestion
- Description - Detailed explanation of the improvement and its benefits
- Labels - Tags to categorize your improvement request
What to Report
We welcome all types of feedback and reports. No feedback is too small—even minor observations can help improve TrueNAS Connect for all users.
Bug Reporting vs. Technical Support
The service desk is for bug reports and product feedback, not for technical support requests.
- Use the service desk for: Reporting bugs, requesting features, or providing feedback about TrueNAS Connect
- For technical support: Contact TrueNAS Support if you need help configuring your TrueNAS systems, troubleshooting issues, or have questions about TrueNAS functionality
Future Support Options
TrueNAS Connect business tiers releasing in 2026 can include basic support from TrueNAS support teams. This provides additional assistance channels for business users beyond the service desk portal.
5 - Use Enclosure Maps
TrueNAS Connect provides enclosure mapping functionality that lets you visualize your storage hardware in a way that reflects your physical system layout. This feature helps you understand the relationship between your drives, pools, and the actual hardware enclosures.
Accessing Enclosure Mapping
Navigate to the Enclosures screen from the main TrueNAS Connect interface to access enclosure mapping features.
Use the System dropdown menu to choose which TrueNAS system you want to view enclosure information for.
Viewing Existing Enclosures
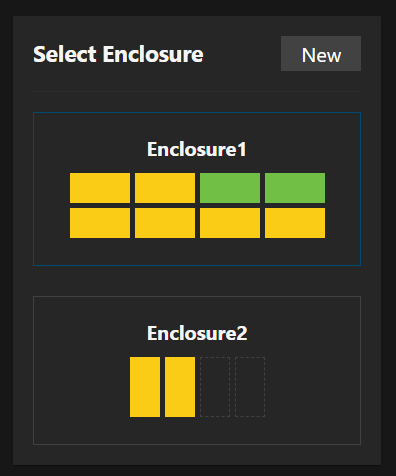
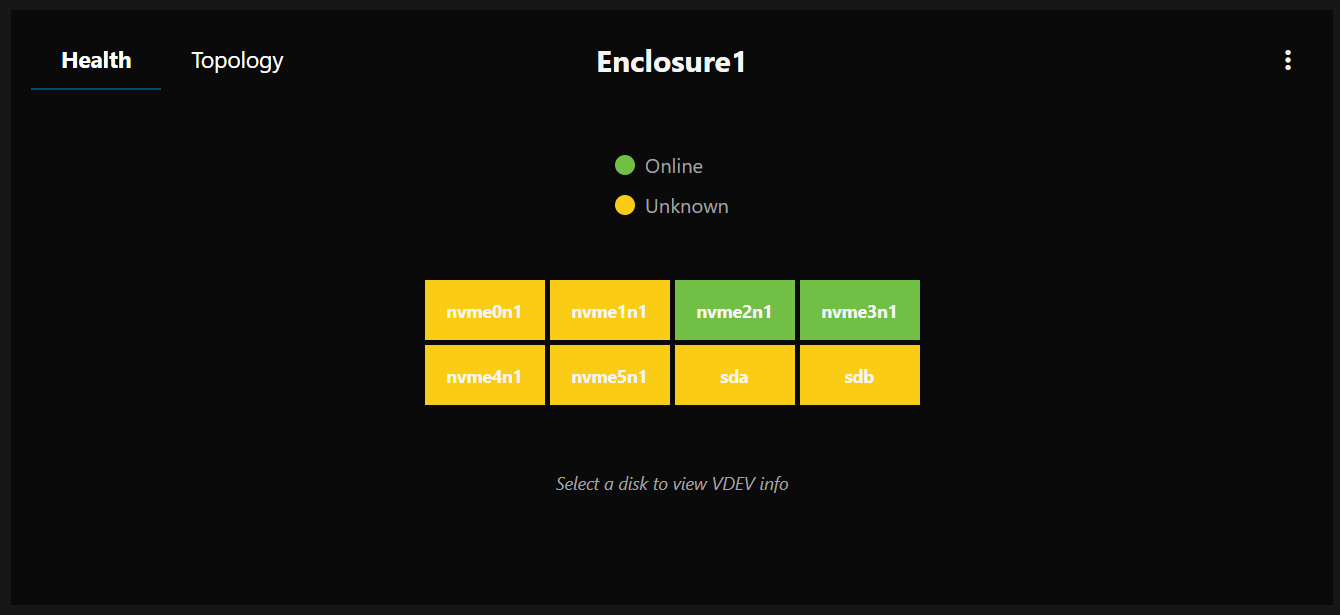
The Select Enclosure panel displays all configured enclosures for your selected system with visual previews showing slot layouts and disk status.
Click on any enclosure from the list to view its detailed information in the main panel. This shows a visual grid representation of all disk slots with color-coded indicators for drive health and pool membership.
Understanding Enclosure Views
- Health view displays disk health status with color-coded indicators showing online (green), unknown (yellow), and empty (dashed outline) states.
- Topology view shows storage pool relationships with colored dots matching drives to their assigned pools.
Use the health legend and topology legend to interpret the visual indicators and understand the current state of your system.
Mapping a New Enclosure
Click the New button in the Select Enclosure panel to begin mapping a new enclosure configuration.
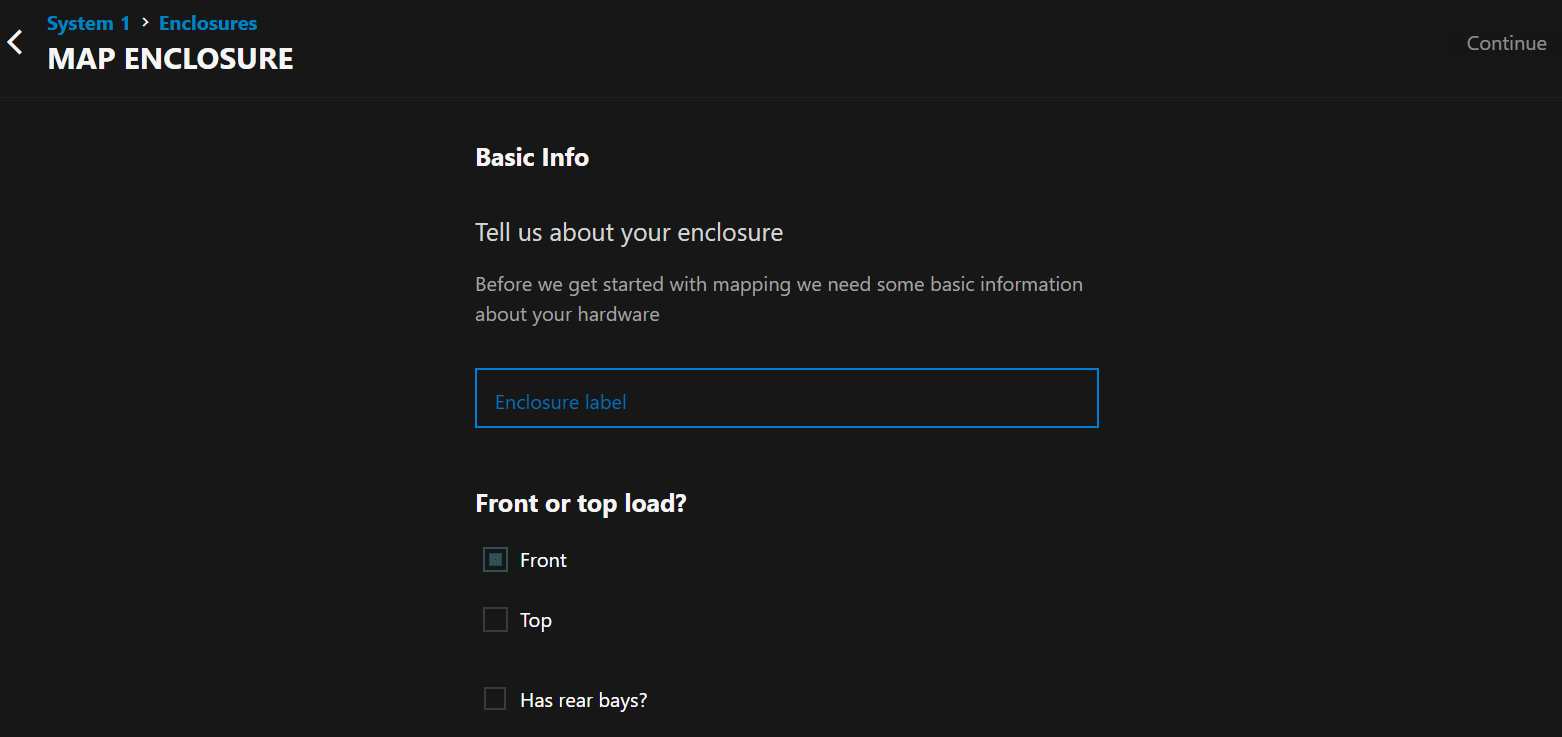
Step 1: Configure Enclosure Details
Enter a descriptive Enclosure Label to identify your hardware.
Select the physical orientation using Front or top load? options:
- Choose Front for enclosures where disks are accessible from the front panel (most common)
- Choose Top for enclosures where disks are accessible from the top
Enable Has rear bays? if your enclosure includes additional disk slots accessible from the rear.
Click Continue to proceed to layout configuration.
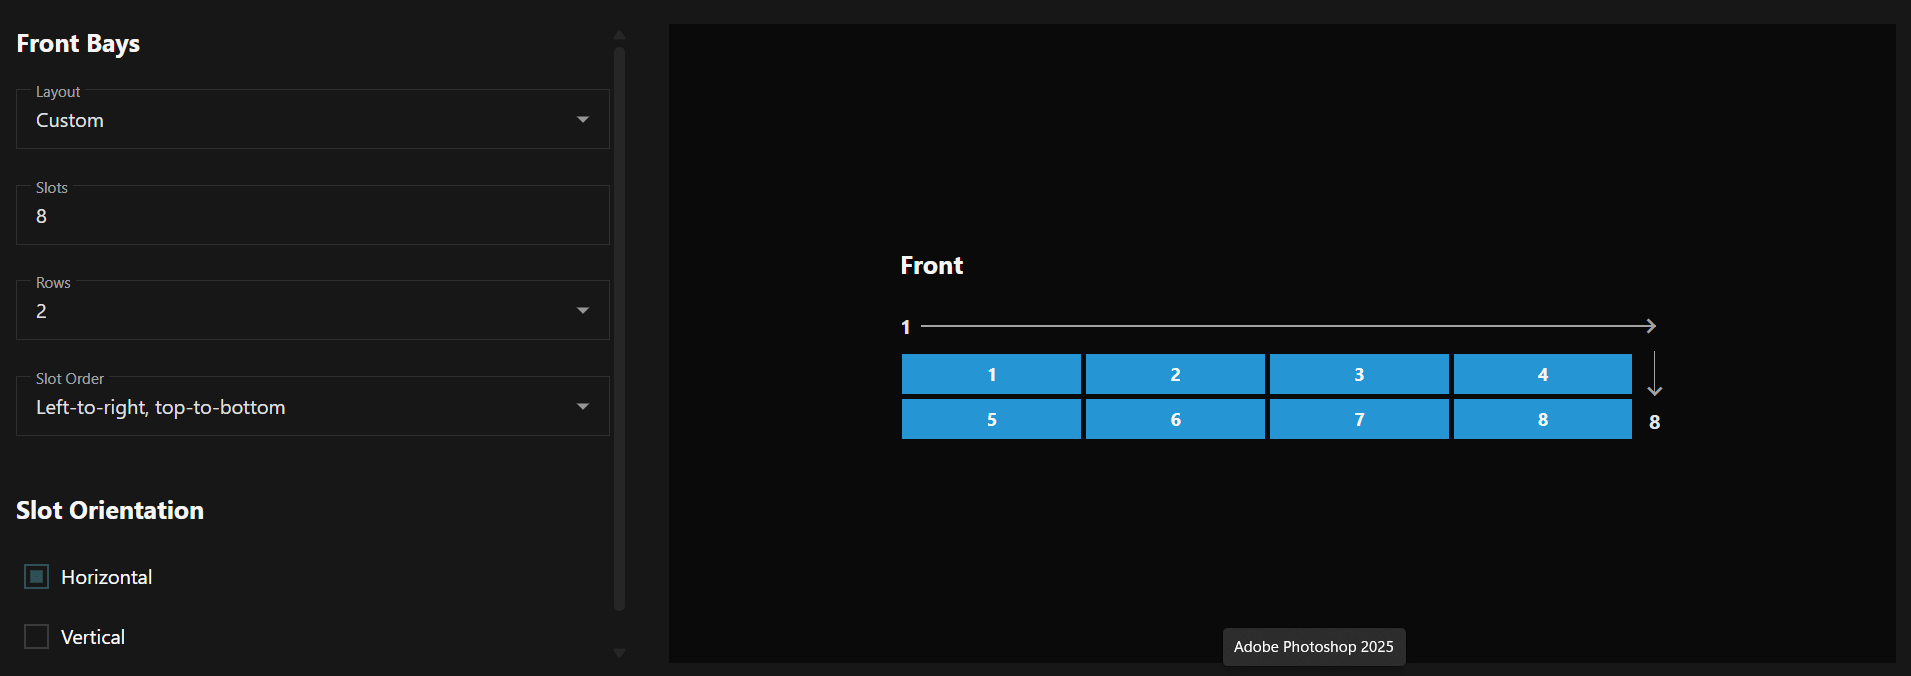
Step 2: Define Enclosure Layout
Choose a Layout preset from the dropdown for common enclosure configurations, or create a custom configuration.
Set the total number of Slots available in your enclosure.
Select the number of Rows for horizontal slot arrangement.
Choose the Slot Order pattern that matches the physical numbering sequence of your enclosure.
Define Slot Orientation as either Horizontal (most common) or Vertical based on how disks are physically inserted.
The enclosure preview updates in real-time as you modify configuration options, allowing you to verify the layout matches your physical hardware.
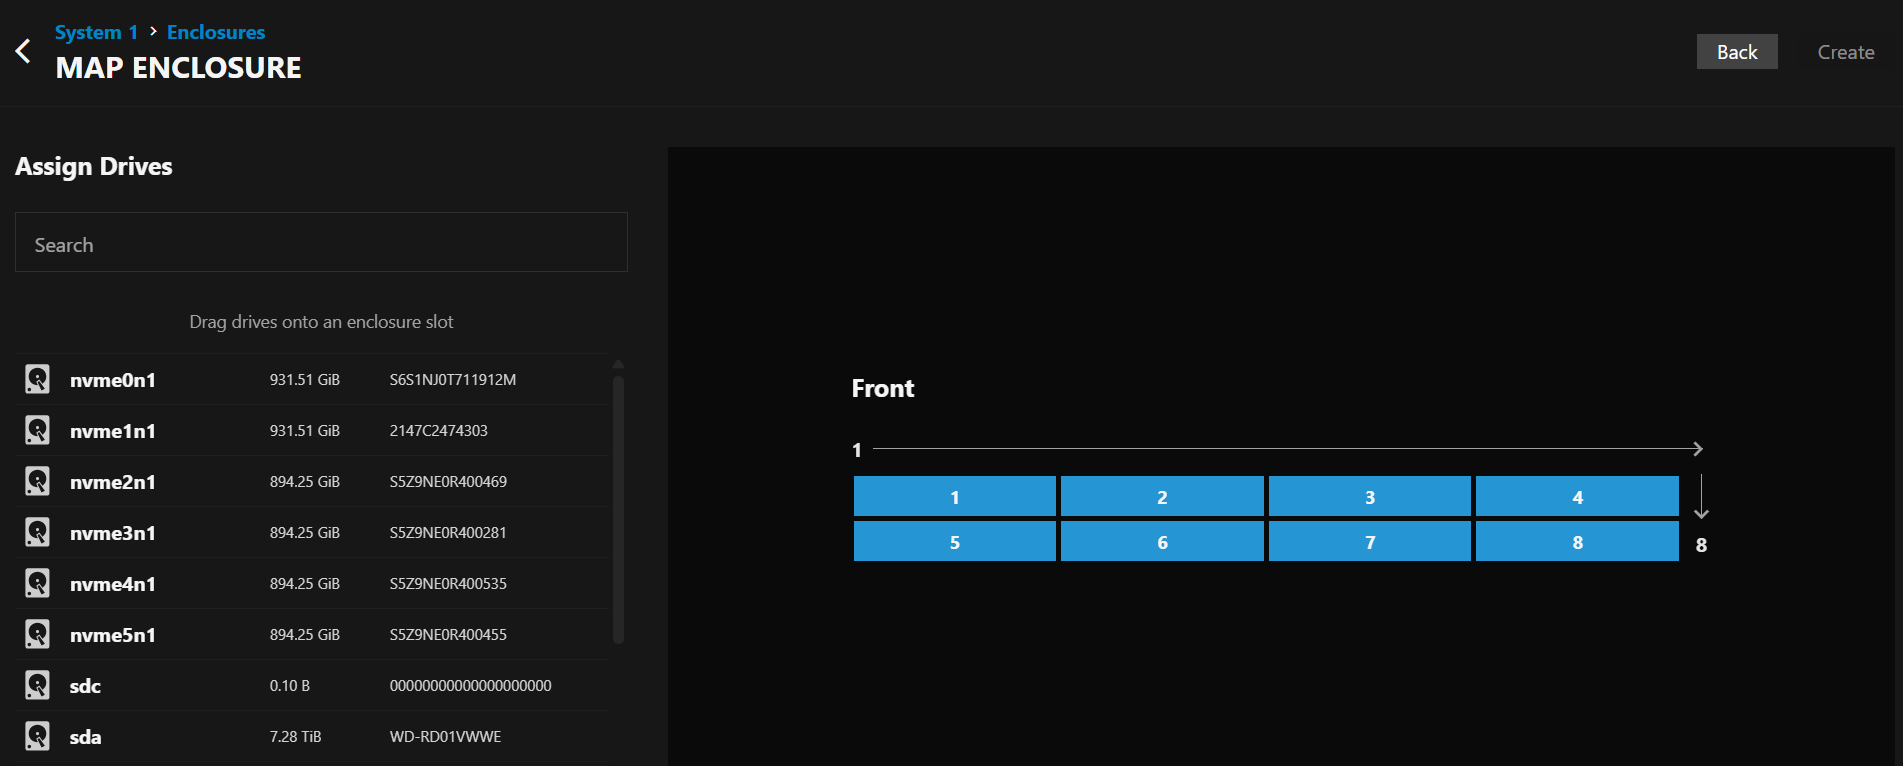
Step 3: Assign Drives
Use the Search field to filter available drives by name or serial number for easier selection.
Drag and drop drives from the Drive List into the appropriate slots in the enclosure preview.
The preview shows real-time updates as you assign drives to slots, helping you match your virtual configuration to your physical hardware layout.
Managing Enclosure Information
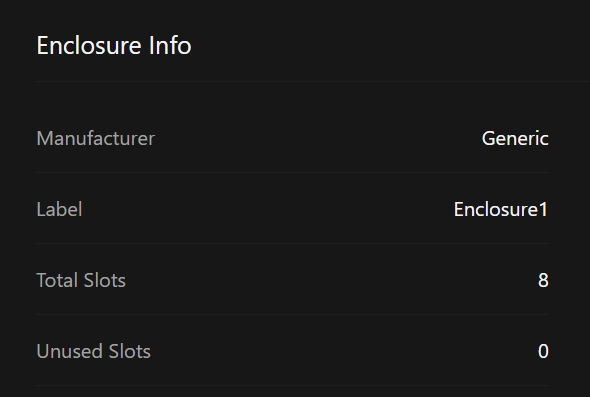
View detailed specifications in the Enclosure Info panel including manufacturer, label, total slots, and unused slots available for expansion.
Click on individual slots in the enclosure view to access detailed disk information and management options for populated slots.
Benefits of Enclosure Mapping
Enclosure mapping provides several advantages for managing your TrueNAS storage:
- Visual Hardware Representation: See your storage layout as it physically exists in your enclosures
- Simplified Troubleshooting: Quickly identify the physical location of drives experiencing issues
- Pool Visualization: Understand how your storage pools are distributed across physical hardware
- Expansion Planning: Identify available slots for future storage expansion
- Drive Management: Easily locate and manage specific drives within your physical enclosures


